Lab 11: Textures & FBOs
Please put your answers to written questions in this lab, if any, in a Markdown file named README.md in your lab repo.
Intro
In Lab 9, you learned how OpenGL stores vertex data in two types of objects called vertex buffer objects (VBOs) and vertex array objects (VAOs). You learned about how to work with scene data in real time. But what about working with 2-dimensional data? In previous projects you worked with a canvas object that displayed your results onto the screen. But how does this work in OpenGL? So far, we have seen the real time pipeline up to the final step in this diagram, the framebuffer.
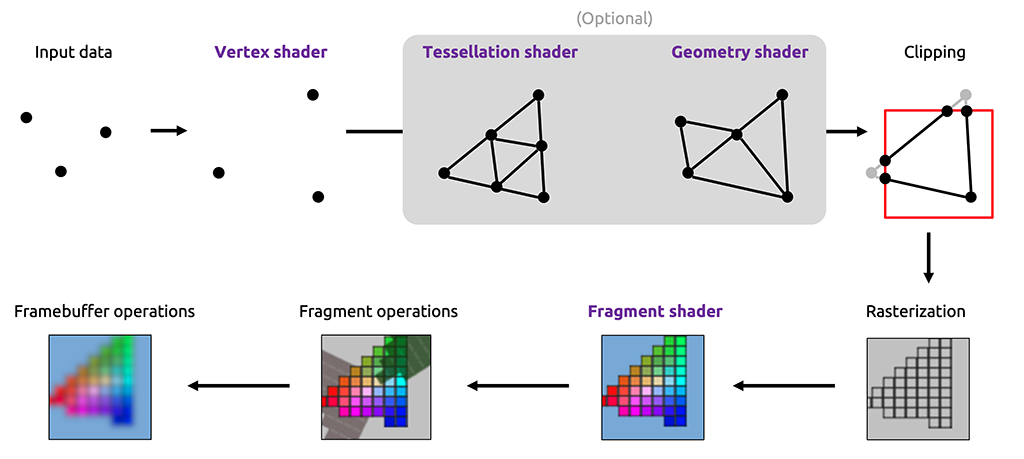
In an oversimplification, the framebuffer is the 2D canvas that OpenGL works with when using your shader program you wrote in the last lab. So far, you haven't had to worry about this since you have been working with the default framebuffer that OpenGL provides which happens to be your application window.
But what if you don't want to draw on the screen? What if you want to draw onto a texture and save it for later? This is where making your own framebuffer objects comes in!
By the end of this lab, you will be able to:
- Understand how textures work in OpenGL,
- Understand framebuffers and when to use them,
- Draw your framebuffers onto your screen,
- Apply cool post-processing effects in real-time!
Textures
Before we dive into the 2D data we draw to, let's think about a common form of 2D data we use in our own scenes…Textures!
What is a Texture?
In OpenGL, a texture is a regular grid of values which can be read from and written to. We'll only be interacting with 2D textures in this lab, though OpenGL also supports 1D and 3D (i.e. volumetric) textures. Texture data can flow from the CPU and GPU (just like vertex data) to be read in a shader. Or the other way around if you’d like to export a texture to the CPU.
Creating a Texture on the CPU
QImages
In Qt creator, the most common form of an image is called a QImage. Let's create one
of our own!
The QImage constructor takes in two parameters:
a file path formatted as a QString, and a format specification which is optional.
In initializeGL, store a QImage in the m_image member variable using the relative file path
(kitten_filepath) of the kitten.png image in our project.
Be sure to have set your working directory to your project directory in order for relative paths to work.
Now let's format our QImage to fit OpenGL standards. Unlike OpenGL, which has its
UV coordinate space origin at the bottom left (which you will learn about soon), a QImage
stores it in the top left. Therefore one of our tasks is to mirror the image vertically.
The second is we need to ensure that we have 8-bit color channels for R, G, B, and A (4 channels in total).
To do this let's overwrite our m_image to be:
m_image = m_image.convertToFormat(QImage::Format_RGBA8888).mirrored();
OpenGL Textures
Now that we have our Qt formatted image, let's put it in an OpenGL texture. To start, we need to generate a texture using the following function:
In initializeGL, generate a texture and store it's id in m_kitten_texture. You
may find the following function useful:
void glGenTextures(GLsizei n, GLuint * textures);
n: This indicates the number of textures we wish to generate.
textures: This is the pointer this function will fill in with an id for the generated texture. Multiple textures can be filled in using a pointer to the first element of an array of sufficient size or some pointer followed by sufficient allocated space.
Before we work with the texture, we need to bind it to the state machine.
In initializeGL, bind our m_kitten_texture. You may find the following function useful:
void glBindTexture(GLenum target, GLuint texture);
target: This indicates the type of texture we are binding. Since we are using a 2D texture, our target will beGL_TEXTURE_2D.
texture: This is the id of the texture we just generated.
Now we have an empty texture sitting in the GL_TEXTURE_2D target in our state machine. Let's fill it with our QImage:
After binding our texture in initializeGL, load our m_image variable into m_kitten_texture. You may find the following useful:
target: This indicates the type of texture we are binding. For now, useGL_TEXTURE_2D.
level: This correlates with the level-of-detail of the image. Since we do not wish to produce a mipmap (scaled texture) at the moment, use 0 for this parameter.
internalformat: This indicates the color format that will be contained within the OpenGL texture object. This is different than the format parameter seen later! For now useGL_RGBA.
width: This is the width of the desired OpenGL texture. For our image, it should bem_image.width().
height: This is the height of the desired OpenGL texture. For our image, it should bem_image.height().
border: Indicates whether or not the image should have a border. For our purposeswe will use the value of 0 to indicate no border.
format: This indicates the color format of the input pixel data. In our case, the sample image usesGL_RGBA.
type: This indicates the data type of the input pixel data. We will useGL_UNSIGNED_BYTEsince it assigns 8 bits per component of R, G, B, and A.
data: This is the pointer to our pixel data. We can get this from ourQImageby using the associatedbits()function.
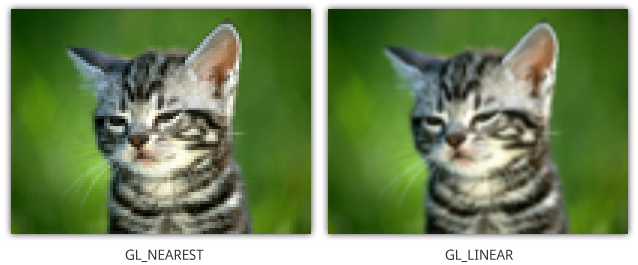
Before we use the texture, we need to specify some behavior it should take on in particular if the image needs to be scaled up or down. Consider the situation where our fragment lies between two pixels in our texture. Which color should it output? These are parameters we can control and in our case we can ask for OpenGL to linearly interpolate between the nearby pixels.
After adding our image data in initializeGL, set the minify
and magnify filters to use linear interpolation. You will find the following function
useful:
void glTexParameteri(GLenum target, GLenum parametername, GLint parametervalue);
target: This indicates the target we bound our texture to. For our purposes, useGL_TEXTURE_2D.
parametername: This is an enum for the parameter we wish to set. Hint: Look at the documentation linked to find the relavant parameter names ;)
parametervalue: This is the value we wish to set for our chosen parameter. See the documentation for a list of parameters and their possible values.
After setting our parameters in initializeGL, unbind our texture from the
GL_TEXTURE_2D target. We can do this by binding texture id 0.
Passing A Texture To The GPU: Uniforms 2 Electric Boogaloo
Now, how do we work with the texture we just created? We can create a uniform variable for it just how we did in the shaders lab for different data types!
Let's begin by creating a uniform variable in our shader that will hold our texture.
The data type of a texture is known as sampler2D.
Add a sampler2D uniform variable to the texture.frag shader file.
Now how do we set this variable? How textures work in OpenGL is using a concept called texture slots.
So far, we have told you that you can just bind a texture using the glBindTexture call.
This is actually only half correct. There is an additional piece of state information
that loads textures onto the GPU. This is the texture slot. Most devices support at
least 32 different texture slots and by default, slot 0 is bound. So when we called
glBindTexture, we were actually binding our texture object to slot 0. The reason we
have multiple slots is so that we can have multiple textures sampled by a shader at the
same time.
To set our uniform, we first need to load our texture into a texture slot, and then indicate which slot index should be sampled in our shader.
To load a texture into a texture slot, the steps are:
- Set the current active texture slot
- Bind the texture
The first call is:
void glActiveTexture(GLenum texture);
texture: This is an enum that represents the texture slot. They are in the format ofGL_TEXTUREi, whereiis an integer representing the slot number. For exampleGL_TEXTURE3is texture slot 3.
The second call is the same glBindTexture call we have seen before.
Before we previously bound our texture in initializeGL, explicitly set the active texture
slot to slot 0.
To set the uniform value, it is represented by an int (HINT: Think glUniform1i) that correlates to the texture
slot we want to use and sample from. That is, if we bind our texture to GL_TEXTURE0, we
should set our uniform value to 0 etc.
In intializeGL, set the uniform value for your sampler2D you created in your fragment shader
to be the same texture slot number we bound our texture to. Remember to call glUseProgram with m_texture_shader
and get the variable location before setting it! Also be sure to return to default state
of program 0 afterwards.
In paintTexture, before calling glDrawArrays, be sure to bind the input parameter texture to
texture slot 0 (Consider using glActiveTexture and glBindTexture).
Using a Texture in the GPU: Fullscreen Quads and UV Coordinates
At this point, we have set our uniform variable for our texture, and are going to use it within our shader program. However, we currently have no triangles to draw our textures on.
Fullscreen Quads
If you recall the OpenGL coordinate system, we can see the limits of the screen in
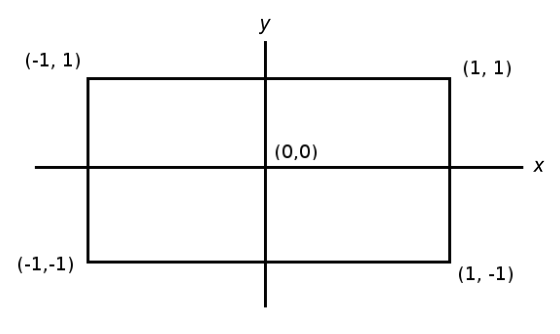
What we can do with this is use it to construct what is known as a fullscreen quad. Think of a fullscreen quad as a projector screen that we drape down in our scene that happens to be just the right size to cover the entire screen so that we can't see behind it, but also can see it in its entirety.
In initializeGL, notice the fullscreen quad VBO data fullscreen_quad_data. Edit it
in order to be the correct size of the screen.
Mess around with fullscreen_quad_data! What happens when you change the z coordinate?
What happens when you only change a single vertex?
UV Coordinates
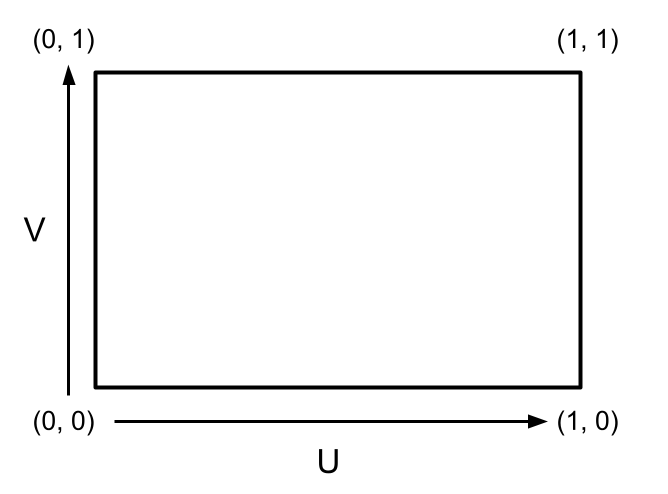
Great! Now we have the shape which we'll plaster our texture, but how do we (texture-)map the image to the surface? In steps a new vertex attribute: UV coordinates!
The UV coordinate attribute tells us at what point in the sampled texture should each vertex correspond to. The lower left corner is set to be (0, 0) and the upper right corner to be (1, 1) as in the following image:
Ahead is a small chunk of tasks in order to add UV coordinates to your fullscreen quad. Do not fret! Most of these calls are reminiscent and reminders of ones you have seen before.
Pick 6 corresponding UV coordinates to pair with each vertex position in fullscreen_quad_data.
Make sure the bottom left corner of the fullscreen quad correlates with the bottom left corner
of the texture and the upper right corner of the fullscreen quad correlates with the
upper right corner of the texture!
Hint: This should be the same process as adding color to your triangle data from lab 9!
In initializeGL, update the VAO attribute information to include the newly added UV
coordinates. Make sure to update the position attribute as well.
Add the UV attribute as a layout variable in texture.vert.
Remember that the attribute index you use in initializeGL for the VAO should match that of the layout variable in the shader!
Create an in/out variable pair to pass the UV coordinates from the texture.vert to
texture.frag. Also be sure to set the out variable of texture.vert to be equal to
the layout input variable we created in the last step!
Sampling a Texture in a Shader
Finally now that we have structured and funneled the appropriate data all the way down to the fragment shader, we can now color our pixels with our texture appropriately.
In texture.frag, set the fragment color based on the texture color at the fragment's
UV coordinate. You can sample a sampler2D uniform with the following function:
gvec4 texture(gsampler2D sampler, vec2 P);
sampler: This is the name of thesampler2Dwe wish to sample from.
P: This is the UV coordinate we wish to sample the texture at.
What is gvec4 and gsampler2D?
In glsl, there are special types for vectors of ints, unsigned ints, doubles, and floats which are given by ivec4, uvec4, dvec4, and vec4 respectively. The same goes for sampler2Ds. The g in gvec4 and gsampler2D is just a placeholder for any one of these types.
Uh Oh 😦
If you run the program at this stage only half of the cat is visible! CheckpaintTextureto see if you can find the bug!
Hint: It looks like only half of the fullscreen quad's vertices were drawn

With the bug fixed, you should see something cute like this on your screen!
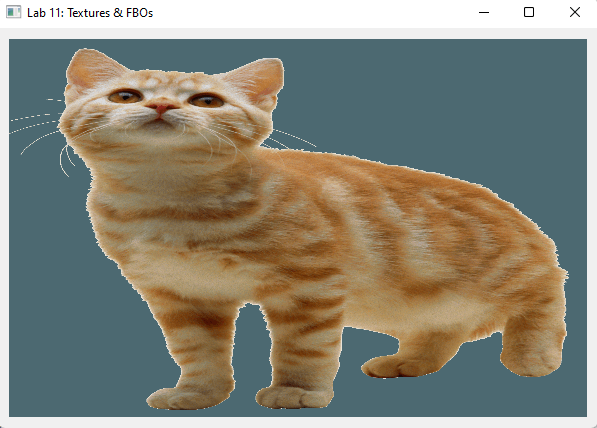
Congrats on making it through textures in OpenGL! Feel free to treat this point as a stopping point for week 1 of this lab. Take a well deserved break and come back for the finale: framebuffers!
Framebuffer Objects (FBOs)
What is an FBO?
Framebuffer: A portion of memory containing bitmaps that can drive displays.
Fancy language aside, lets break down the word itself into components:
- Frame: Canvas, screen space, originally used for the term of "next/current frame"
- Buffer: Data storage
- Object: Something, in this case a container that holds other information
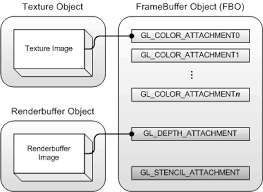
What does an FBO contain?
Framebuffers contain things in OpenGL known as attachments. These include color buffers, depth buffers, and stencil buffers which you will learn more about shortly. Each buffer is represented by a sub-object being either:
- A Texture
- A Renderbuffer
So far you have already been working with textures. As you may recall, textures are usually 2D objects which have both read and write capabilities.
This is where renderbuffers differ! A renderbuffer can serve almost the same purpose of a texture, except it only has capability to be written to.
You can remember this functionality by thinking of the name. Renderbuffer refers to an object that can be rendered or written to.
What does an FBO's attached buffer contain?
Unknowingly, we have actually used framebuffers before. The default framebuffer happens to be: the application window!
Alongside this, we have also seen one of the attachments before. So far in the fragment
shader, we have explicitly written to a vec4 variable fragColor which sets pixels in
the color buffer to whatever we choose!
The ones we have not directly seen are depth and stencil buffers.
Depth buffers contain information about how far away a specific pixel is from the camera.
We can write to the depth buffer by calling glEnable(GL_DEPTH_TEST). This allows
OpenGL to store depth information in the default framebuffer's depth buffer such that if
we draw two triangles on top of one another, OpenGL can tell which should display on top.
Stencil buffers contain information that is generated by special masks that enables certain pixels to be drawn or not. This is not important at the moment, but if you wish to draw something like outlines or recursive portals, this comes in handy.
Making our own FBO
Next, we will generate and bind our own FBO.
In makeFBO, generate an FBO and store it in m_fbo. Then bind it. You may find the following useful:
void glGenFramebuffers(GLsizei n, GLuint *framebuffers);
n: This indicates the number of framebuffer objects to create.
framebuffers: This is the pointer this function will fill in with an id for the generated FBO. This way you can refer to it later by the same stored id. Multiple FBOs can be filled in using a pointer to the first element of an array of sufficient size or some pointer followed by sufficient allocated space.
void glBindFramebuffer(GLenum target, GLuint framebuffer);
target: This indicates the type of framebuffer we wish to bind. For our purposes, useGL_FRAMEBUFFER.
framebuffer: This is id of the FBO we wish to bind.
Before we configure our FBO, we need to generate containers for its attachments. As stated previously, these can either be Textures or Renderbuffers. Let's try using a Texture in place of our color attachment.
In makeFBO, generate an empty texture, m_fbo_texture and bind it to texture slot 0.
This will be used to store our color buffer.
Why are we binding to texture slot 0?
You may recall that earlier we already boud one texture to slot 0, so the question may be why we are overwriting that slot with a new texture? We could use a separate texture slot, and have both textures actively bound, but this is typically only necessary if we actually need to use both textures at the same time. For example this is useful when your shader contains multiple textures it needs to sample from at the same time. However, we will only ever be using one texture in our shader at a time.
To generate an empty texture, when calling
glTexImage2D, pass in a nullptr for the data. Be sure to set the same minify and magnify parameters as well as return to default state by unbinding our texture once we haveset all its parameters. When setting the width and height, usem_fbo_widthandm_fbo_heightrespectively.
What is the m_devicePixelRatio variable m_screen_width, m_screen_height, m_fbo_height, and
m_fbo_width are all initialized with?
m_devicePixelRatio variable m_screen_width, m_screen_height, m_fbo_height, and
m_fbo_width are all initialized with?For high density displays such as retina displays on many Mac computers, there is a discrepancy between the physical pixels on the screen and the device-independent pixels in a window. This parameter will take into account this ratio and generate the proper width and height of the window in pixels. You can read more here.
Next let's use instead a Renderbuffer to store our depth and stencil attachments.
Why not use another Texture?
If you recall, as opposed to Textures, Renderbuffers can only be written to. This allows
for OpenGL to make some behind-the-scenes optimizations. For depth information, we
do not need to sample it like we do the colors of a texture. Later on, we will redraw our FBO by
using its color attachment texture just how we did the m_kitten_texture to draw back
to the screen. But depth calculations are all self contained during the render process
and we do not need to sample it for our purposes.
In makeFBO, generate a renderbuffer in m_fbo_renderbuffer, bind it, then set its configuration using glRenderbufferStorage. You
may find the following functions useful:
void glGenRenderbuffers(GLsizei n, GLuint *renderbuffers);
n: This indicates the number of renderbuffer objects to create.
renderbuffers: This is the pointer this function will fill in with an id for the generated RBO. This way you can refer to it later by the same stored id. Multiple RBOs can be filled in using a pointer to the first element of an array of sufficient size or some pointer followed by sufficient allocated space.
void glBindRenderbuffer(GLenum target, GLuint renderbuffer);
target: This indicates the type of renderbuffer we wish to bind. For our purposes, useGL_RENDERBUFFER.
renderbuffer: This is id of the RBO we wish to bind.
void glRenderbufferStorage(GLenum target, GLenum internalformat, GLsizei width, GLsizei height);
target: This indicates the type of framebuffer we wish to work with. For our purposes, useGL_RENDERBUFFER.
internalformat: This indicates the pixel data format that will be contained within the renderbuffer. We wiil be usingGL_DEPTH24_STENCIL8which indicates 24 bits will be used for the depth component and 8 for the stencil component.
width: This is the width of the desired renderbuffer. For our purposes, usem_fbo_width.
height: This is the height of the desired renderbuffer. For our purposes, usem_fbo_height.3
Be sure to unbind our Renderbuffer once we have set its configuration!
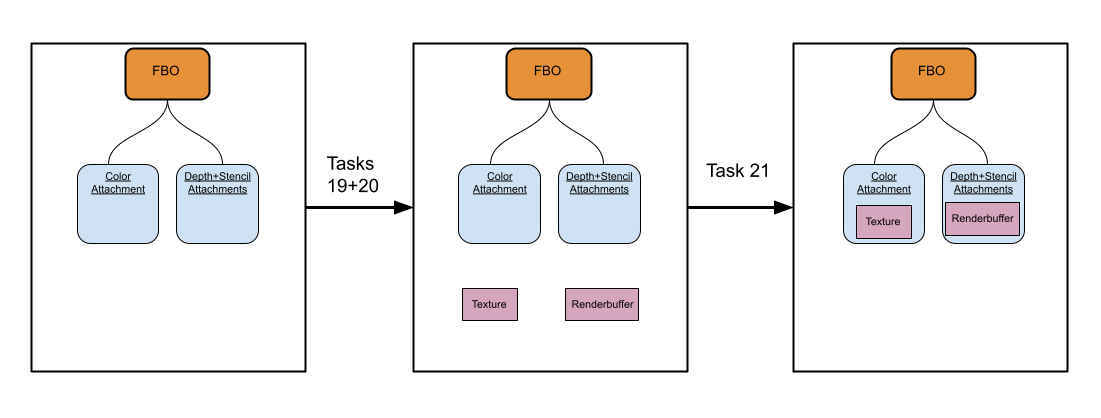
Now we can attach both of our attachments to the FBO we generated.
In makeFBO after binding our FBO, attach both the color and depth/stencil attachemnts.
You may find the following functions useful:
target: This indicates the type of framebuffer we are working with. Just like inglBindFramebuffer, useGL_FRAMEBUFFER.
attachment: This is the specific attachment we wish to add, since we are attaching a color buffer, useGL_COLOR_ATTACHMENT0.
textarget: This indicates the type of texture we are using. In our case, useGL_TEXTURE_2D.
texture: Here we place the texture object we wish to use. In our case this ism_fbo_texture.
level: This specifies which mipmap or level of detail texture we want to use. We want full detail so use 0.
target: This indicates the type of framebuffer we are working with. Just like inglBindFramebuffer, useGL_FRAMEBUFFER.
attachment: This is the specific attachment we wish to add, since we are attaching a depth and stencil buffer, useGL_DEPTH_STENCIL_ATTACHMENT.
renderbuffertarget: This indicates the type of renderbuffer we are using. In our case, useGL_RENDERBUFFER.
renderbuffer: Here we place the renderbuffer object we wish to use. In our case this ism_fbo_renderbuffer.
In makeFBO, return to default state by unbinding our FBO. Do this by binding the FBO with id: m_defaultFBO.
This is a const GLuint currently set to 0, but may not work properly which you will find out later.
Drawing with our FBO
Return of the Sphere
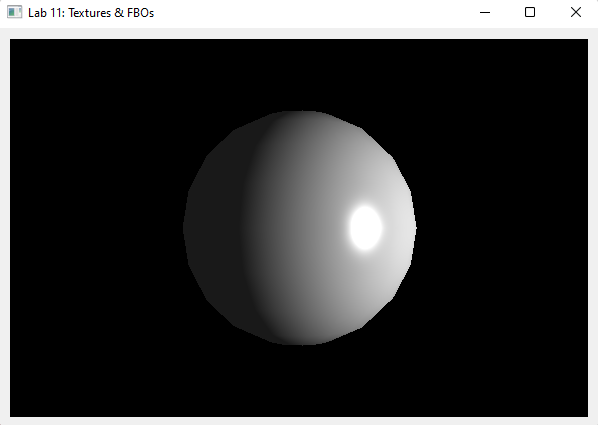
Let's see what happens when we draw to our FBO! But first, lets get our sphere from lab 10 showing on the screen again.
In paintGL, comment out your current code. Uncomment the segment labeled for this task
which should get us back to the sphere from the previous lab.
At this point, you should see the same sphere you saw in lab 10 on your screen:
Next, lets try drawing to our custom framebuffer! In OpenGL, glDrawArrays will utilize
whichever framebuffer is currently bound, so lets change the current FBO.
In paintGL, before glClear is called, bind our FBO.
If you run the program, you should see a black screen:
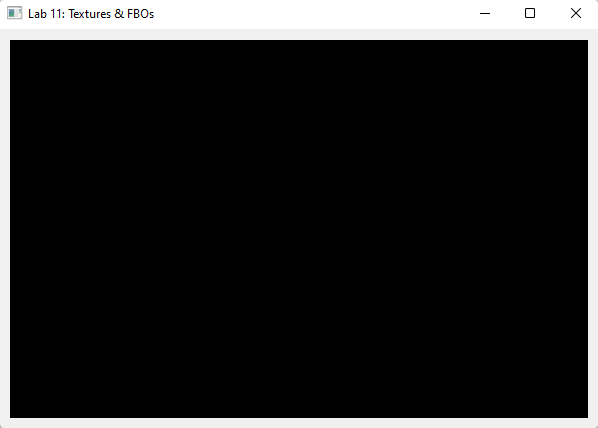
What happened?
Instead of drawing to the screen, we drew to an offscreen framebuffer. So where is our
output image stored now? In m_fbo_texture! This is the texture that we set to store our
color information.
Back to Basics
To fix this, lets create a way to just draw our color buffer back onto the screen. Luckily
this is the exact same operation we have been doing in texture.vert and texture.frag.
Next, lets make sure we draw to the default framebuffer after we already drew offscreen.
In paintGL, after paintExampleGeometry is called, bind the default framebuffer by binding
the m_defaultFBO value which is declared near the top of initializeGL
as a value of 0. This my need to change in a little bit so be sure to bind the variable rather than
the plain value of 0!
Next we can call glClear once more to clear our screen.
In paintGL, after binding the default framebuffer, clear the screen using glClear. Be sure to clear
both the color, and depth bits!
Now we want to draw our fbo color attachment onto the screen as a texture. This should be the same process we used to draw the kitten to our screen earlier!
In paintGL, after clearing the screen, call paintTexture with m_fbo_texture to draw our fbo color
attachment onto our previous fullscreen quad.
If you run the program now, you still may see a black screen. Why is this?
In Qt Creator, the default framebuffer does not actually correspond to slot 0 :(.
Instead, the default begins at a value of 1. Then, for each FBO that is created,
the default FBO handle will increment by 1. That is, since we created 1 FBO of our own, the default
FBO will have a handle value of 2. Near the top of initializeGL, replace the m_defaultFBO
from a value of 0 to 2. If still nothing shows up, please let a TA know.
On high pixel density displays such as that of retina displays of Mac laptops, you may see the image appear in the bottom left quadrant rather than the full screen. Why is this?
glViewport
This is because when we drew to our custom framebuffer, we never told OpenGL what size "screen" it was drawing to! As we have seen before, OpenGL space is represented by a box with x and y dimensions ranging from -1 to 1. What OpenGL needs to know is how to map the pixel space on the screen, say 600 x 400 to the OpenGL space as just defined with limits of -1 to 1 on both x and y. As best practice, whenever switching between framebuffers of differing sizes, it is important to call glViewport.
In paintGL, after binding m_fbo, set the viewport to the appropriate size. After binding
m_defaultFBO, also set the viewport to the screen size. The following function may be useful:
void glViewport(GLint x, GLint y, GLsizei width, GLsizei height);
x: This is the x coordinate of the lower left corner of our screen. For our purposes this is 0.
y: This is the y coordinate of the lower left corner of our screen. For our purposes this is also 0.
width: This is the width of our FBO we wish to draw to. For our FBO, we can usem_fbo_width, which should match what we used to generate our FBO attachments. For our screen, we can usem_screen_widthinstead.
height: Similarly to width, this specifies the height of the FBO we are drawing to. For our FBO, we can usem_fbo_height, which should match what we used to generate our FBO attachments. For our screen, we can usem_screen_heightinstead.
Why are x and y both 0?
You can think of the screen as a giant texture with its origin at the bottom left corner. Because of this, in the above call we are specifying which pixel coordinates we wish to draw too. In general we would like the pixel at
At this stage, you should finally be back to seeing the same sphere you saw a few steps ago!
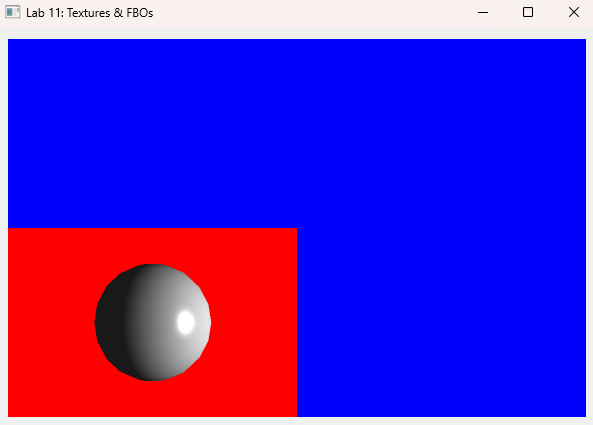
Debugging
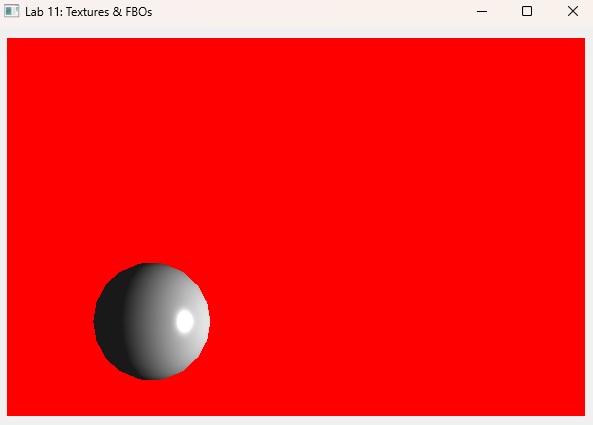
If you still are having issues with your image being shrunk or in the wrong location, it is first important to determine where this is happening: in the draw to the custom framebuffer, or in the draw to the screen. One way we can differentiate the two is in our drawing loop, if before clearing the screen the first time we set the clear color to red, and then if before clearing the screen the second time we set our clear color to blue, then we will be able to tell which step is not drawing to the correct region as we hoped. Here is an example of the above schema when we set the viewport the second time around to be half the desired size (with the lower left corner still being
And here is an example of the above schema when the viewport the first time around is set to be half the desired size (with the lower left corner still being
FBO Functionality
Post Processing
So far in our post-processing shader, we have done nothing but redraw our scene as is. Lets take advantage of having the pixels at our disposal and make some alterations.
First, let's add some customizabiliy to our texture shader program.
In texture.frag, add a uniform bool which will be used to toggle on and off post-processing.
In glRenderer.h, change the function signature of paintTexture to include an extra
boolean parameter on whether or not to post-process the texture.
In glRenderer.cpp, correct the function signature of paintTexture to what you wrote in
glRenderer.h and be sure to update any previous calls you made to paintTexture to
take this into account. In particular, in paintGL, update your call to paintTexture
to turn filtering on.
A bool uniform can be set using the glUniform1i function. In paintTexture, use glGetUniformLocation
and glUniform1i to set your custom bool uniform in m_texture_shader depending on the input
bool parameter you added to paintTexture.
If we wish to invert our colors, since each color value in OpenGL is on a 0 to 1 scale, we can simply take any color cahnnel value and subtract it from 1 in order to get the inverse of that color channel.
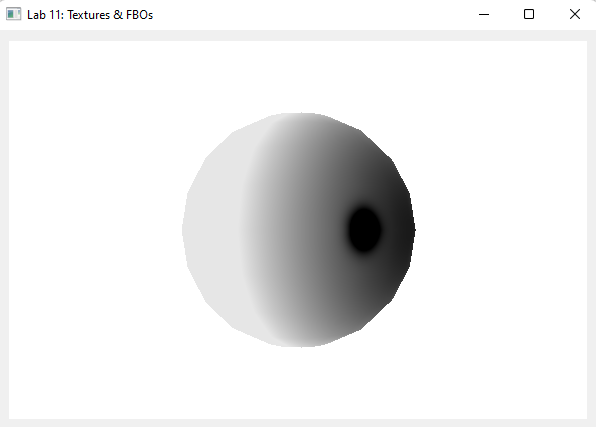
In texture.frag, if your custom boolean is set to true, invert the channels of fragColor.
If you run the program, you should see your sphere has been warped into an inverse shadow realm!
There are many cool effects you can apply using framebuffers, including, kernel-based image filtering, particle effects, or even draw portals with usage of the FBO's stencil attachment!
Resizing Framebuffers
If you resize the screen, you will notice some bizarre behavior occurs. Why is this? Well,
while we resized our default framebuffer, our custom offscreen framebuffer hasn't changed
at all. Unfortunately, it is not easy to resize the FBO attachments we generated individually.
However, we can do something simple: delete and remake our FBO! Because we have a makeFBO function
this makes the step of remaking a lot simpler.
In resizeGL, delete our FBO attachments and FBO itself by using glDeleteTextures, glDeleteRenderbuffers,
and glDeleteFramebuffers.
Then, call makeFBO to regenerate a new Framebuffer.
Note that we have already updated
m_fbo_widthandm_fbo_heightfor you inresizeGL.
Memory Management
Before we exit, it is important to delete any memory we generated with glGen calls.
In finish, delete our kitten texture, FBO texture, FBO renderbuffer, and FBO itself.
Submission
Submit your GitHub link and commit ID to the "Lab 11: Textures & FBOs" assignment on Gradescope, then get checked off by a TA at hours.
Reference the GitHub + Gradescope Guide here.