Project 6: Action!
You can find the section handout for this project here.
Please read this project handout before going to algo section!
Introduction
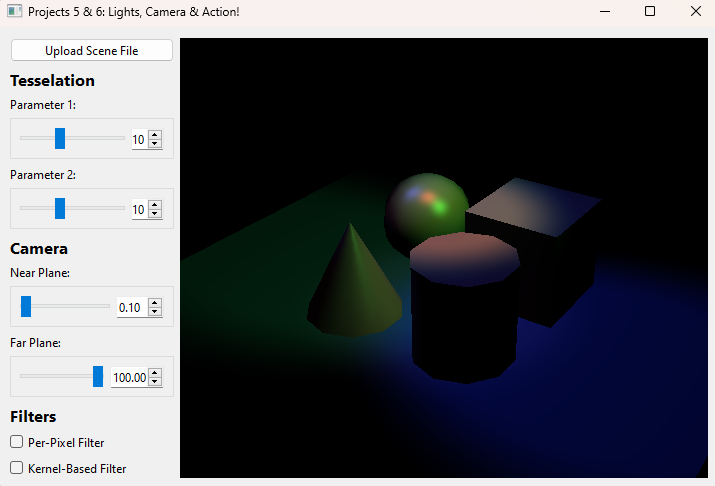
In the last project, you set up the foundation to render a static scene using a scene parser, a camera, VBOs/VAOs, and shaders.
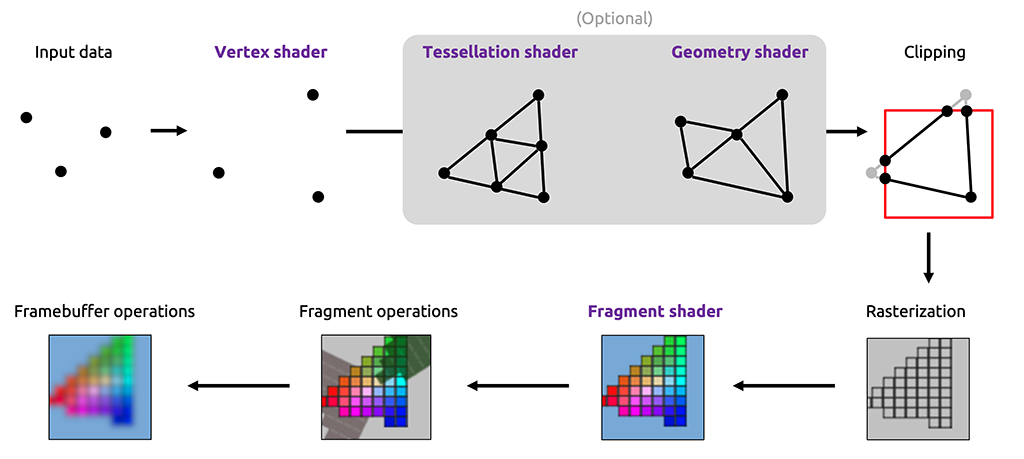
In this project, you will extend your code to handle camera movement, finish your Phong illumination model, and apply post-processing effects to your scene using FBOs.
Requirements
Lights
For this project you will be expected to add support for:
- Point Lights w/ Attenuation
- Spot Lights w/ Attenuation & Penumbra
Most of the heavy lifting for the Phong illumination model you have already implemented: color computation, ambient, diffuse, specular, etc. Now you need to finish adding support for the different light types and add in attenuation for the light types that support it.
Point Lights: Similar to Ray, these lights are defined by their position and follow a standard quadratic attenuation fall off given by
where function.
Spot Lights: Using the same mathematics as in the Ray projects, these lights follow not only the standard distance falloff, but an additional angular falloff defined by angle and falloff in the stencil light object.
Camera Movement
As the name of this project implies, this is the step where you will implement the action.
For translational movement, your input and output will be required to match the following:
- W: Translates the camera in the direction of the look vector
- S: Translates the camera in the opposite direction of the look vector
- A: Translates the camera in the left direction, perpendicular to the look and up vectors
- D: Translates the camera in the right direction, also perpendicular to the look and up vectors. This movement should be opposite to that of pressing A
- Space: Translates the camera along the world space vector
- Ctrl: Translates the camera along the world space vector
For this project we would like you to move at a speed of 5 world-space units per second. Use the deltaTime parameter in the timerEvent function to help achieve this.
For rotational movement, your input and output will be required to match the following:
- Mouse X Distance Traveled: Rotates the camera about the axis defined by the world space vector
- Mouse Y Distance Traveled: Rotates the camera about the axis defined by a vector perpendicular to the look and up vectors of the camera.
- Mouse Left Click: ONLY apply camera rotations if the left mouse button is currently held. This is similar behavior to the brush project so feel free to look back at your old code for inspiration.
Hint: A perpendicular vector to two other vectors can be calculated by taking a cross product!
While we don't force a specific speed for rotation due to wide variance in mice sensitivity, your rotation must be dependent on the distance the mouse has traveled which is given as deltaX and deltaY within mouseMoveEvent.
You may notice there are a few things left up to your discretion. Whether you rotate CW or CCW on mouse movement as well as sensitivity is up to you, as long your implementation follows the general guidelines above.
In particular, we have provided for you 6 different event functions you may find useful for this task:
mousePressEvent, mouseReleaseEvent, mouseMoveEvent, keyPressEvent, keyRepeatEvent, keyReleaseEvent.
Important: You may NOT use the following GLM functions--we expect you to have a good enough understanding of transform matrices to construct helper functions for each of these if necessary:
glm::scale()glm::rotate()glm::translate()
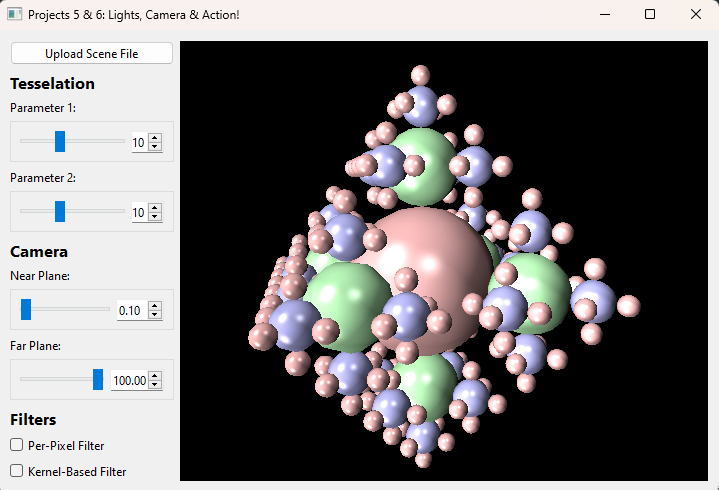
FBOs
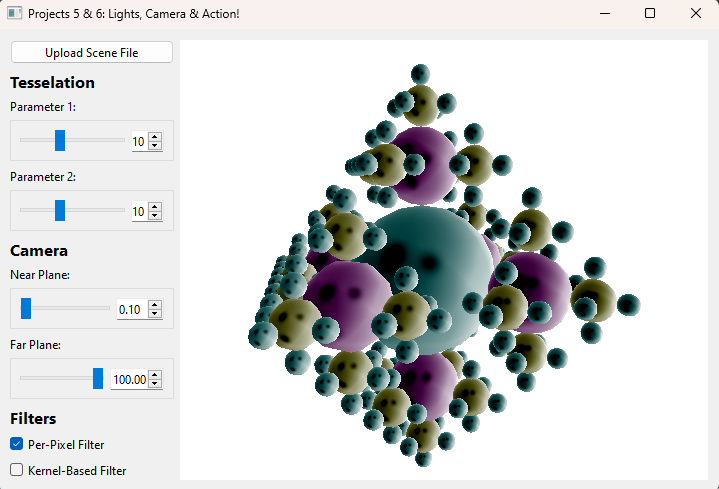
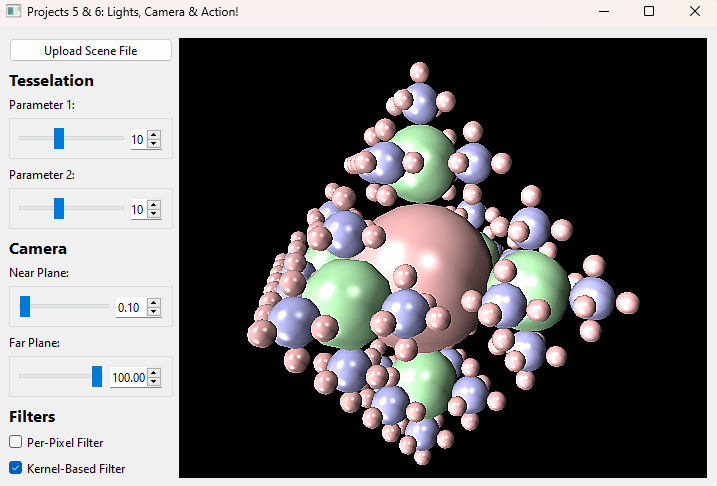
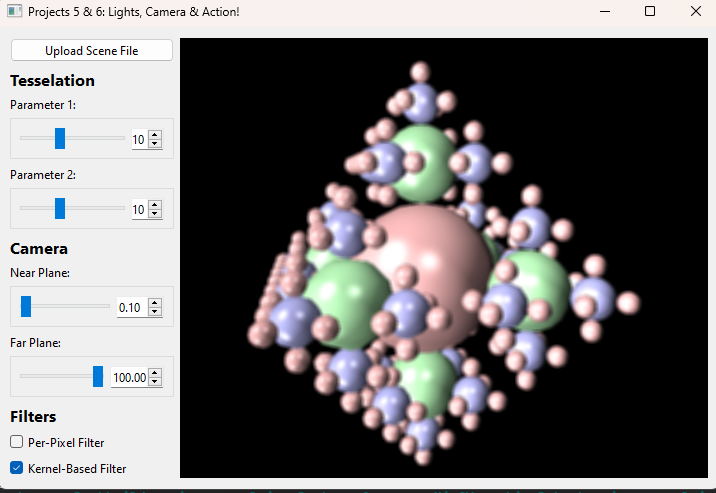
For this project, you will be required to integrate Framebuffers into your project and use them to apply 2 different effects of your choosing. In particular, you must pick one effect from each of the following lists:
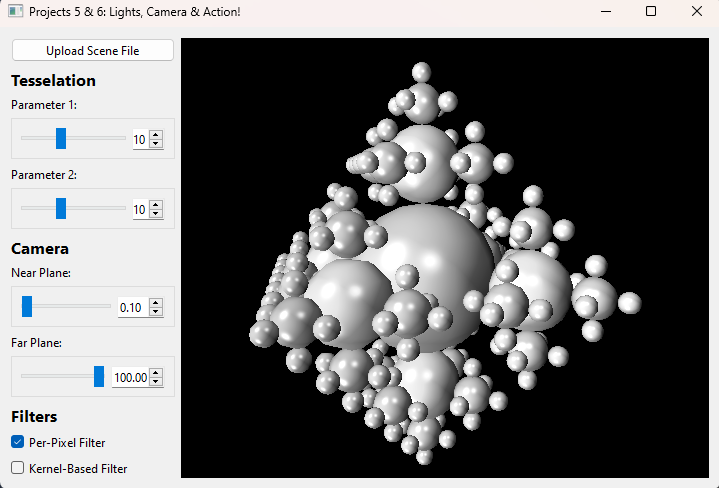
- Per-pixel: invert, grayscale
- Kernel-based: sharpen, box blur (5x5 2D kernel)
Sharpen Kernel:
** 5x5 Box Blur Kernel:**
We would also like you to have some sort of variable to control what the default framebuffer value is as in lab 11. Please also include in your README how TAs can change it's value since depending on the OS, we may require a different default FBO value in order to draw to the screen for our TA machines.
There is a discrepancy in expected behavior for kernel-based filters depending on your device and if it has a HiDPI display. You can read more in Task 19 of Lab 11. We provide reference images on Windows (not HiDPI) for sharpen and blur filters, as well on macOS (HiDPI) for the blur filter below. Note that it is not necessarily the case that Windows is HiDPI and macOS is not HiDPI.

Tips on Convolution in Shaders
Consider how sampling a nearby pixel correlates to changing your current UV coordinate. How would you increment your UV coordinate to sample a pixel 1 to the right in a 300 x 300 image? How will you know the dimensions of your image when sampling it in your shader?
In addition, OpenGL handles edge cases for you. In particular, the default texture wrapping behavior is to repeat or tile the image over and over outside of its standard bounds. For example, inputting a UV coordinate of
The Stencil
You will be continuing to work within the same codebase as the previous assignment. However there are a few things you have now unlocked moving into Project 6!
Realtime::settingsChanged()
In Project 5, you used this function to get information about the cameras near and far planes as well as your tessellation parameters. For this project, the new settings you will have to use are:
settings.perPixelFilter: Should activate the implemented per-pixel filter of your choice.settings.kernelBasedFilter: Should activate the implemented kernel-based filter of your choice.
Realtime::____event() Functions
For these functions, there are really only 2 you should need to use for this project: mouseMoveEvent and timerEvent.
timerEvent is called on a loop which is attempting to run 60 times per second. However because loops can never be perfect, we have calculated for you the time between loops labeled in a variable deltaTime which you can use for translational movement.
mouseMoveEvent is called whenever the mouse moves. We have calculated in this function for you deltaX and deltaY which tell you how far the mouse has moved. In addition, we have also applied a variable m_mouseDown which lets you know if the left mouse button is currently clicked.
m_keyMap
A new member variable that will be useful to you is labeled m_keyMap. This is an std::unordered_map containing Qt::Keys as the key and a boolean representing whether or not the key is currently pressed down at any given time. One example of how to use this member variable is:
m_keyMap[Qt::Key_W]: Returns whether or not the "W" key is pressed down
m_keyMap comes equipped to handle the keys: Qt::Key_W, Qt::Key_A, Qt::Key_S, Qt::Key_D, Qt::Key_Space, and Qt::Key_Control.
Scenes Viewer
To assist with creating and modifying scene files, we have made a web viewer called Scenes. From this site, you are able to upload scenefiles or start from a template, modify properties, then download the scene JSON to render with your raytracer.
We hope that this is a fun and helpful tool as you implement the rest of the projects in the course which all use this scenefile format!
For more information, here is our published documentation for the JSON scenefile format and a tutorial for using Scenes.
TA Demos
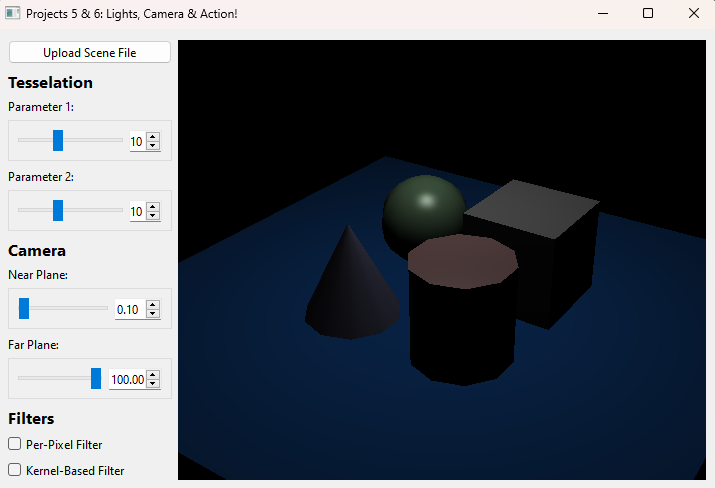
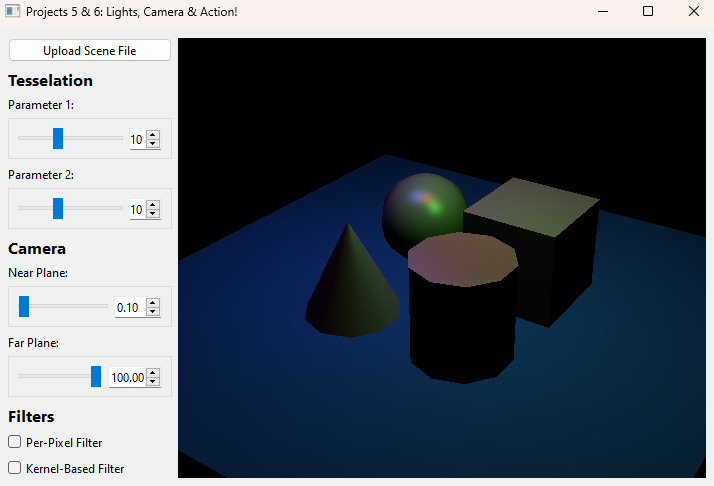
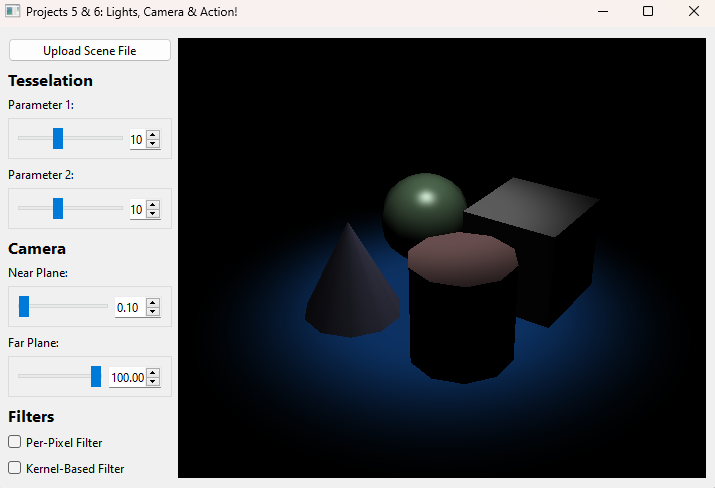
Demos of the TA solution are available in this Google Drive folder titled projects_action_min.
macOS Warning: "____ cannot be opened because the developer cannot be verified."
If you see this warning, don't eject the disk image. You can allow the application to be opened from your system settings:
Settings > Privacy & Security > Security > "____ was blocked from use because it is not from an identified developer." > Click "Allow Anyway"
README
Your repo should include a README in Markdown format with the filename README.md. Like the previous projects, you will put your required outputs here. Also, be sure to completely fill out the template to include basic information about your design choices, the names of students you collaborated with, any known bugs, and the extra credit you've implemented.
Please also, as described in the FBO section, include an explanation for TAs to quickly change the value of the default framebuffer such that they can run your code on their machines if needed.
For extra credit, please describe what you've done and point out the related part of your code.
Grading
For points deducted regarding software engineering/efficiency in your implementation of Project 5: Lights, Camera, you will have the same points deducted again for this part of the project if these are not corrected.
This project is out of 100 points:
- Camera Interactability (30 points)
- Translation on Key Press (15 points)
- Rotation on Mouse Movement (15 points)
- Additional Lights (25 points)
- Point Lights w/ Attenuation (10 points)
- Spot Lights w/ Penumbra (15 points)
- FBOs (25 points)
- Per-Pixel Filter (10 points)
- Kernel-Based Filter (15 points)
- Software Engineering, Efficiency, & Stability (20 points)
Extra Credit
Remember that half-credit requirements count as extra credit if you are not enrolled in the half-credit course.
All of the extra credit options for Project 5 (Lights, Camera) are also valid options here, provided you haven't already received credit for them on Project 5.
In addition, we suggest the following extra features:
- Implement More Filters
- Per-Pixel Filter (up to 2 points): Implement another per-pixel based filter
- Kernel-Based or Multi-Stage Filter (3-5 points, check with staff): Besides the 2 listed filters, there are many other filters that require multiple stages in a render pipeline. These can include things such as bloom or even edge detection having 2 sobel kernels as you experienced in the filter project! Note: You may implement a maximum of 2 per-pixel and 2 kernel-based filters for extra credit!
- Screen Space Ambient Occlusion (up to 10 points): Screen space ambient occlusion is one way to help fake global illumination in a directly illuminated model. Implement the algorithm in your realtime pipeline for some extra credit!
- Directional Light Shadow Maps (up to 10 points): Implement shadow mapping for directional lights.
- Texture Mapping (up to 8 points): Add uv coordinates to your shapes and use them to give your shapes the textures they are assigned in their materials.
- Fast Approximate Anti-Aliasing (up to 10 points): Implement the FXAA algorithm in a GLSL shader.
- Connect Your Real Time Renderer to Your Raytracer (up to 5 points): Professional 3D software packages (such as Blender or Maya) provide an interactive 3D viewport onto the scene being modeled, but they also provide interfaces to render the scene with higher-quality methods (such as ray tracing). Add a button to the UI for this project which calls your ray tracer to render the scene from the current camera viewpoint.
CS 1234/2230 students must attempt at least 8 points of extra credit.
Submission
Submit your Github repo for this project to the "Project 6: Action! (Code)" assignment on Gradescope.